$ ./bin/elasticsearch-certutil ca This tool assists you in the generation of X.509 certificates and certificate signing requests for use with SSL/TLS in the Elastic stack.
The 'ca' mode generates a new 'certificate authority' This will create a new X.509 certificate and private key that can be used to sign certificate when running in'cert' mode.
Use the 'ca-dn' option if you wish to configure the 'distinguished name' of the certificate authority
By default the 'ca' mode produces a single PKCS#12 output file which holds: * The CA certificate * The CA's private key If you elect to generate PEM format certificates (the -pem option), then the output will be a zip file containing individual files for the CA certificate and private key Please enter the desired output file [elastic-stack-ca.p12]: # 这里直接回车 Enter password for elastic-stack-ca.p12 : # 这里也是直接回车
$ ./bin/elasticsearch-certutil cert --ca elastic-stack-ca.p12
This tool assists you in the generation of X.509 certificates and certificate
signing requests for use with SSL/TLS in the Elastic stack.

The 'cert' mode generates X.509 certificate and private keys.
    * By default, this generates a single certificate and key for use
       on a single instance.
    * The '-multiple' option will prompt you to enter details for multiple
       instances and will generate a certificate and key for each one
    * The '-in' option allows for the certificate generation to be automated by describing
       the details of each instance in a YAML file

    * An instance is any piece of the Elastic Stack that requires an SSL certificate.
      Depending on your configuration, Elasticsearch, Logstash, Kibana, and Beats
      may all require a certificate and private key.
    * The minimum required value for each instance is a name. This can simply be the
      hostname, which will be used as the Common Name of the certificate. A full
      distinguished name may also be used.
    * A filename value may be required for each instance. This is necessary when the
      name would result in an invalid file or directory name. The name provided here
      is used as the directory name (within the zip) and the prefix for the key and
      certificate files. The filename is required if you are prompted and the name
      is not displayed in the prompt.
    * IP addresses and DNS names are optional. Multiple values can be specified as a
      comma separated string. If no IP addresses or DNS names are provided, you may
      disable hostname verification in your SSL configuration.


    * All certificates generated by this tool will be signed by a certificate authority (CA)
      unless the --self-signed command line option is specified.
      The tool can automatically generate a new CA for you, or you can provide your own with
      the --ca or --ca-cert command line options.


By default the 'cert' mode produces a single PKCS#12 output file which holds:
    * The instance certificate
    * The private key for the instance certificate
    * The CA certificate

If you specify any of the following options:
    * -pem (PEM formatted output)
    * -multiple (generate multiple certificates)
    * -in (generate certificates from an input file)
then the output will be be a zip file containing individual certificate/key files

Enter password for CA (elastic-stack-ca.p12) :                          # 因为 CA 证书没有设置密码,所以这里直接回车
Please enter the desired output file [elastic-certificates.p12]:        # 直接回车
Enter password for elastic-certificates.p12 :                           # 直接回车,不设置节点证书密码

Certificates written to /usr/local/elastic/elastic-certificates.p12

This file should be properly secured as it contains the private key for
your instance.
This file is a self contained file and can be copied and used 'as is'
For each Elastic product that you wish to configure, you should copy
this '.p12' file to the relevant configuration directory
and then follow the SSL configuration instructions in the product guide.

For client applications, you may only need to copy the CA certificate and
configure the client to trust this certificate.
The 'http'command guides you through the process of generating certificates for use on the HTTP (Rest) interface for Elasticsearch.
This tool will ask you a number of questions in order to generate the right set of files for your needs.
## Do you wish to generate a Certificate Signing Request (CSR)?
A CSR is used when you want your certificate to be created by an existing Certificate Authority (CA) that you do not control (that is, you don't have access to the keys for that CA). If you are in a corporate environment with a central security team, then you may have an existing Corporate CA that can generate your certificate for you. Infrastructure within your organisation may already be configured to trust this CA, so it may be easier for clients to connect to Elasticsearch if you use a CSR and send that request to the team that controls your CA. If you choose not to generate a CSR, this tool will generate a new certificate for you. That certificate will be signed by a CA under your control. This is a quick and easy way to secure your cluster with TLS, but you will need to configure all your clients to trust that custom CA. Generate a CSR? [y/N]n # 不需要生成 CSR 证书 ## Do you have an existing Certificate Authority (CA) key-pair that you wish to use to sign your certificate? If you have an existing CA certificate and key, then you can use that CA to sign your new http certificate. This allows you to use the same CA across multiple Elasticsearch clusters which can make it easier to configure clients, and may be easier for you to manage. If you do not have an existing CA, one will be generated for you. Use an existing CA? [y/N]y # 用已存在的 CA 证书 ## What is the path to your CA? Please enter the full pathname to the Certificate Authority that you wish to use for signing your new http certificate. This can be in PKCS#12 (.p12), JKS (.jks) or PEM (.crt, .key, .pem) format. CA Path: certs/elastic-stack-ca.p12 # 指定 CA 证书的位置,根为 elasticstack安装目录下的 config/ 目录 Reading a PKCS12 keystore requires a password. It is possible for the keystore's password to be blank, inwhichcase you can simply press <ENTER> at the prompt Password for elastic-stack-ca.p12:
## How long should your certificates be valid?
Every certificate has an expiry date. When the expiry date is reached clients will stop trusting your certificate and TLS connections will fail.
Best practice suggests that you should either: (a) set this to a short duration (90 - 120 days) and have automatic processes to generate a new certificate before the old one expires, or (b) set it to a longer duration (3 - 5 years) and then perform a manual update a few months before it expires.
You may enter the validity period in years (e.g. 3Y), months (e.g. 18M), or days (e.g. 90D)
For how long should your certificate be valid? [5y] 5y # 证书的期限,输入 5y 表示5年
## Do you wish to generate one certificate per node?
If you have multiple nodes in your cluster, then you may choose to generate a separate certificate for each of these nodes. Each certificate will have its own private key, and will be issued for a specific hostname or IP address.
Alternatively, you may wish to generate a single certificate that is valid across all the hostnames or addresses in your cluster.
If all of your nodes will be accessed through a single domain (e.g. node01.es.example.com, node02.es.example.com, etc) then you may find it simpler to generate one certificate with a wildcard hostname (*.es.example.com) and use that across all of your nodes.
However, if you do not have a common domain name, and you expect to add additional nodes to your cluster in the future, then you should generate a certificate per node so that you can more easily generate new certificates when you provision new nodes.
Generate a certificate per node? [y/N]y # 为每个节点生成证书
## What is the name of node #1?
This name will be used as part of the certificate file name, and as a descriptive name within the certificate.
You can use any descriptive name that you like, but we recommend using the name of the Elasticsearch node.
node #1 name: node-1 # 第一个节点的名称
## Which hostnames will be used to connect to node-1?
These hostnames will be added as "DNS" names in the "Subject Alternative Name" (SAN) field in your certificate.
You should list every hostname and variant that people will use to connect to your cluster over http. Do not list IP addresses here, you will be asked to enter them later.
If you wish to use a wildcard certificate (for example *.es.example.com) you can enter that here.
Enter all the hostnames that you need, one per line. When you are done, press <ENTER> once more to move on to the next step.
## Which IP addresses will be used to connect to node-1?
If your clients will ever connect to your nodes by numeric IP address, then you can list these as valid IP "Subject Alternative Name" (SAN) fields in your certificate.
If you do not have fixed IP addresses, or not wish to support direct IP access to your cluster then you can just press <ENTER> to skip this step.
Enter all the IP addresses that you need, one per line. When you are done, press <ENTER> once more to move on to the next step.
The generated certificate will have the following additional configuration values. These values have been selected based on a combination of the information you have provided above and secure defaults. You should not need to change these values unless you have specific requirements.
Do you wish to change any of these options? [y/N]n # 不要修改参数 Generate additional certificates? [Y/n]n # 不要生成其它证书
## What password do you want for your private key(s)?
Your private key(s) will be stored in a PKCS#12 keystore file named "http.p12". This type of keystore is always password protected, but it is possible to use a blank password.
If you wish to use a blank password, simply press <enter> at the prompt below. Provide a password for the "http.p12" file: [<ENTER> for none]
## Where should we save the generated files?
A number of files will be generated including your private key(s), public certificate(s), and sample configuration options for Elastic Stack products.
These files will be included in a single zip archive.
What filename should be used for the output zip file? [/usr/local/elastic/elasticsearch-ssl-http.zip]
Zip file written to /usr/local/elastic/elasticsearch-ssl-http.zip
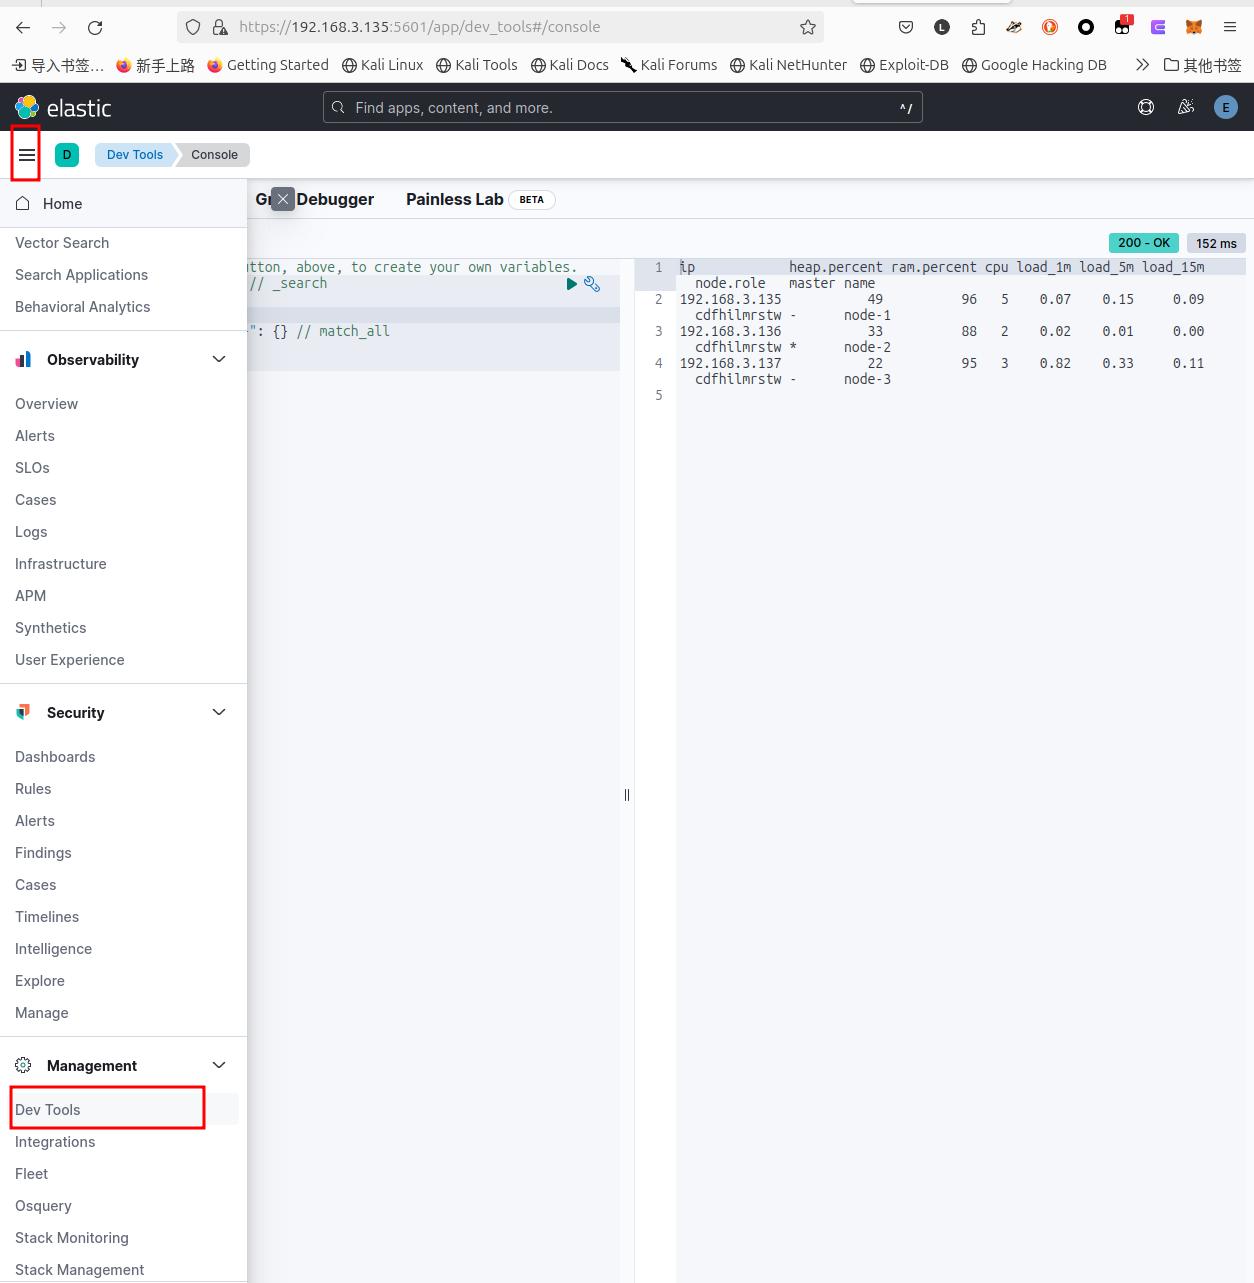
# ======================== Elasticsearch Configuration ========================= # # NOTE: Elasticsearch comes with reasonable defaults for most settings. # Before you set out to tweak and tune the configuration, make sure you # understand what are you trying to accomplish and the consequences. # # The primary way of configuring a node is via this file. This template lists # the most important settings you may want to configure for a production cluster. # # Please consult the documentation for further information on configuration options: # https://www.elastic.co/guide/en/elasticsearch/reference/index.html # # ---------------------------------- Cluster ----------------------------------- # # Use a descriptive name for your cluster: # cluster.name:cluster-es # # ------------------------------------ Node ------------------------------------ # # Use a descriptive name for the node: # node.name:node-1 # # Add custom attributes to the node: # #node.attr.rack: r1 # # ----------------------------------- Paths ------------------------------------ # # Path to directory where to store the data (separate multiple locations by comma): # path.data:/data/elastic/data # # Path to log files: # path.logs:/data/elastic/logs # # ----------------------------------- Memory ----------------------------------- # # Lock the memory on startup: # #bootstrap.memory_lock: true # # Make sure that the heap size is set to about half the memory available # on the system and that the owner of the process is allowed to use this # limit. # # Elasticsearch performs poorly when the system is swapping the memory. # # ---------------------------------- Network ----------------------------------- # # By default Elasticsearch is only accessible on localhost. Set a different # address here to expose this node on the network: # network.host:192.168.3.135 network.publish_host:192.168.3.135 # # By default Elasticsearch listens for HTTP traffic on the first free port it # finds starting at 9200. Set a specific HTTP port here: # http.port:9200 # # For more information, consult the network module documentation. # # --------------------------------- Discovery ---------------------------------- # # Pass an initial list of hosts to perform discovery when this node is started: # The default list of hosts is ["127.0.0.1", "[::1]"] # #discovery.seed_hosts: ["host1", "host2"] discovery.seed_hosts: ["192.168.3.135", "192.168.3.136", "192.168.3.137"] # # Bootstrap the cluster using an initial set of master-eligible nodes: # #cluster.initial_master_nodes: ["node-1", "node-2"] # # For more information, consult the discovery and cluster formation module documentation. # # ---------------------------------- Various ----------------------------------- # # Allow wildcard deletion of indices: # #action.destructive_requires_name: false
#----------------------- BEGIN SECURITY AUTO CONFIGURATION ----------------------- # # The following settings, TLS certificates, and keys have been automatically # generated to configure Elasticsearch security features on 30-05-2024 02:52:48 # # --------------------------------------------------------------------------------
# Enable security features xpack.security.enabled:true
xpack.security.enrollment.enabled:true
# Enable encryption for HTTP API client connections, such as Kibana, Logstash, and Agents xpack.security.http.ssl: enabled:true keystore.path:certs/http.p12
# Enable encryption and mutual authentication between cluster nodes xpack.security.transport.ssl: enabled:true verification_mode:certificate keystore.path:certs/elastic-certificates.p12 truststore.path:certs/elastic-certificates.p12 # Create a new cluster with the current node only # Additional nodes can still join the cluster later cluster.initial_master_nodes: ["node-1"] http.host: [_local_, _site_] ingest.geoip.downloader.enabled:false xpack.security.http.ssl.client_authentication:none
#----------------------- END SECURITY AUTO CONFIGURATION -------------------------
# ======================== Elasticsearch Configuration ========================= # # NOTE: Elasticsearch comes with reasonable defaults for most settings. # Before you set out to tweak and tune the configuration, make sure you # understand what are you trying to accomplish and the consequences. # # The primary way of configuring a node is via this file. This template lists # the most important settings you may want to configure for a production cluster. # # Please consult the documentation for further information on configuration options: # https://www.elastic.co/guide/en/elasticsearch/reference/index.html # # ---------------------------------- Cluster ----------------------------------- # # Use a descriptive name for your cluster: # cluster.name:cluster-es # # ------------------------------------ Node ------------------------------------ # # Use a descriptive name for the node: # node.name:node-2 # # Add custom attributes to the node: # #node.attr.rack: r1 # # ----------------------------------- Paths ------------------------------------ # # Path to directory where to store the data (separate multiple locations by comma): # path.data:/data/elastic/data # # Path to log files: # path.logs:/data/elastic/logs # # ----------------------------------- Memory ----------------------------------- # # Lock the memory on startup: # #bootstrap.memory_lock: true # # Make sure that the heap size is set to about half the memory available # on the system and that the owner of the process is allowed to use this # limit. # # Elasticsearch performs poorly when the system is swapping the memory. # # ---------------------------------- Network ----------------------------------- # # By default Elasticsearch is only accessible on localhost. Set a different # address here to expose this node on the network: # network.host:192.168.3.136 # # By default Elasticsearch listens for HTTP traffic on the first free port it # finds starting at 9200. Set a specific HTTP port here: # http.port:9200 # # For more information, consult the network module documentation. # # --------------------------------- Discovery ---------------------------------- # # Pass an initial list of hosts to perform discovery when this node is started: # The default list of hosts is ["127.0.0.1", "[::1]"] # #discovery.seed_hosts: ["host1", "host2"] discovery.seed_hosts: ["192.168.3.135", "192.168.3.136", "192.168.3.137"] # # Bootstrap the cluster using an initial set of master-eligible nodes: # #cluster.initial_master_nodes: ["node-1", "node-2"] # # For more information, consult the discovery and cluster formation module documentation. # # ---------------------------------- Various ----------------------------------- # # Allow wildcard deletion of indices: # #action.destructive_requires_name: false
#----------------------- BEGIN SECURITY AUTO CONFIGURATION ----------------------- # # The following settings, TLS certificates, and keys have been automatically # generated to configure Elasticsearch security features on 30-05-2024 02:52:48 # # --------------------------------------------------------------------------------
# Enable security features xpack.security.enabled:true
xpack.security.enrollment.enabled:true
# Enable encryption for HTTP API client connections, such as Kibana, Logstash, and Agents xpack.security.http.ssl: enabled:true keystore.path:certs/http.p12
# Enable encryption and mutual authentication between cluster nodes xpack.security.transport.ssl: enabled:true verification_mode:certificate keystore.path:certs/elastic-certificates.p12 truststore.path:certs/elastic-certificates.p12 # Create a new cluster with the current node only # Additional nodes can still join the cluster later cluster.initial_master_nodes: ["node-1"] http.host: [_local_, _site_] ingest.geoip.downloader.enabled:false xpack.security.http.ssl.client_authentication:none
#----------------------- END SECURITY AUTO CONFIGURATION -------------------------
# ======================== Elasticsearch Configuration ========================= # # NOTE: Elasticsearch comes with reasonable defaults for most settings. # Before you set out to tweak and tune the configuration, make sure you # understand what are you trying to accomplish and the consequences. # # The primary way of configuring a node is via this file. This template lists # the most important settings you may want to configure for a production cluster. # # Please consult the documentation for further information on configuration options: # https://www.elastic.co/guide/en/elasticsearch/reference/index.html # # ---------------------------------- Cluster ----------------------------------- # # Use a descriptive name for your cluster: # cluster.name:cluster-es # # ------------------------------------ Node ------------------------------------ # # Use a descriptive name for the node: # node.name:node-3 # # Add custom attributes to the node: # #node.attr.rack: r1 # # ----------------------------------- Paths ------------------------------------ # # Path to directory where to store the data (separate multiple locations by comma): # path.data:/data/elastic/data # # Path to log files: # path.logs:/data/elastic/logs # # ----------------------------------- Memory ----------------------------------- # # Lock the memory on startup: # #bootstrap.memory_lock: true # # Make sure that the heap size is set to about half the memory available # on the system and that the owner of the process is allowed to use this # limit. # # Elasticsearch performs poorly when the system is swapping the memory. # # ---------------------------------- Network ----------------------------------- # # By default Elasticsearch is only accessible on localhost. Set a different # address here to expose this node on the network: # network.host:192.168.3.137 # # By default Elasticsearch listens for HTTP traffic on the first free port it # finds starting at 9200. Set a specific HTTP port here: # http.port:9200 # # For more information, consult the network module documentation. # # --------------------------------- Discovery ---------------------------------- # # Pass an initial list of hosts to perform discovery when this node is started: # The default list of hosts is ["127.0.0.1", "[::1]"] # #discovery.seed_hosts: ["host1", "host2"] discovery.seed_hosts: ["192.168.3.135", "192.168.3.136", "192.168.3.137"] # # Bootstrap the cluster using an initial set of master-eligible nodes: # #cluster.initial_master_nodes: ["node-1", "node-2"] # # For more information, consult the discovery and cluster formation module documentation. # # ---------------------------------- Various ----------------------------------- # # Allow wildcard deletion of indices: # #action.destructive_requires_name: false
#----------------------- BEGIN SECURITY AUTO CONFIGURATION ----------------------- # # The following settings, TLS certificates, and keys have been automatically # generated to configure Elasticsearch security features on 30-05-2024 02:52:48 # # --------------------------------------------------------------------------------
# Enable security features xpack.security.enabled:true
xpack.security.enrollment.enabled:true
# Enable encryption for HTTP API client connections, such as Kibana, Logstash, and Agents xpack.security.http.ssl: enabled:true keystore.path:certs/http.p12
# Enable encryption and mutual authentication between cluster nodes xpack.security.transport.ssl: enabled:true verification_mode:certificate keystore.path:certs/elastic-certificates.p12 truststore.path:certs/elastic-certificates.p12 # Create a new cluster with the current node only # Additional nodes can still join the cluster later cluster.initial_master_nodes: ["node-1"] http.host: [_local_, _site_] ingest.geoip.downloader.enabled:false xpack.security.http.ssl.client_authentication:none
#----------------------- END SECURITY AUTO CONFIGURATION -------------------------
$ ./bin/elasticsearch-reset-password -u elastic --url https://192.168.3.135:9200
This tool will reset the password of the [elastic] user to an autogenerated value.
The password will be printed in the console.
Please confirm that you would like to continue [y/N]y


Password for the [elastic] user successfully reset.
New value: LBPAyv5BKKnr1C_2sc15
$ cd /usr/local/elastic && ./bin/elasticsearch-certutil csr --name kibana --dns node-1
This tool assists you in the generation of X.509 certificates and certificate
signing requests for use with SSL/TLS in the Elastic stack.

The 'csr' mode generates certificate signing requests that can be sent to
a trusted certificate authority
    * By default, this generates a single CSR for a single instance.
    * You can use the '-multiple' option to generate CSRs for multiple
       instances, each with their own private key.
    * The '-in' option allows for the CSR generation to be automated
       by describing the details of each instance in a YAML file

    * An instance is any piece of the Elastic Stack that requires an SSL certificate.
      Depending on your configuration, Elasticsearch, Logstash, Kibana, and Beats
      may all require a certificate and private key.
    * The minimum required value for each instance is a name. This can simply be the
      hostname, which will be used as the Common Name of the certificate. A full
      distinguished name may also be used.
    * A filename value may be required for each instance. This is necessary when the
      name would result in an invalid file or directory name. The name provided here
      is used as the directory name (within the zip) and the prefix for the key and
      certificate files. The filename is required if you are prompted and the name
      is not displayed in the prompt.
    * IP addresses and DNS names are optional. Multiple values can be specified as a
      comma separated string. If no IP addresses or DNS names are provided, you may
      disable hostname verification in your SSL configuration.


The 'csr' mode produces a single zip file which contains the certificate
signing requests and private keys for each instance.
    * Each certificate signing request is provided as a standard PEM encoding of a PKCS#10 CSR.
    * Each key is provided as a PEM encoding of an RSA private key

Please enter the desired output file [csr-bundle.zip]:

Certificate signing requests have been written to /usr/local/elastic/csr-bundle.zip

This file should be properly secured as it contains the private keys for all
instances.

After unzipping the file, there will be a directory for each instance containing
the certificate signing request and the private key. Provide the certificate
signing requests to your certificate authority. Once you have received the
signed certificate, copy the signed certificate, key, and CA certificate to the
configuration directory of the Elastic product that they will be used for and
follow the SSL configuration instructions in the product guide.
$ ./bin/elasticsearch-reset-password -u kibana --url https://192.168.3.135:9200
This tool will reset the password of the [kibana] user to an autogenerated value.
The password will be printed in the console.
Please confirm that you would like to continue [y/N]y


Password for the [kibana] user successfully reset.
New value: ZoaMa4*ozG5aPM8YcAxC
# For more configuration options see the configuration guide for Kibana in # https://www.elastic.co/guide/index.html
# =================== System: Kibana Server =================== # Kibana is served by a back end server. This setting specifies the port to use. server.port:5601
# Specifies the address to which the Kibana server will bind. IP addresses and host names are both valid values. # The default is 'localhost', which usually means remote machines will not be able to connect. # To allow connections from remote users, set this parameter to a non-loopback address. server.host:"node-1"
# Enables you to specify a path to mount Kibana at if you are running behind a proxy. # Use the `server.rewriteBasePath` setting to tell Kibana if it should remove the basePath # from requests it receives, and to prevent a deprecation warning at startup. # This setting cannot end in a slash. #server.basePath: ""
# Specifies whether Kibana should rewrite requests that are prefixed with # `server.basePath` or require that they are rewritten by your reverse proxy. # Defaults to `false`. #server.rewriteBasePath: false
# Specifies the public URL at which Kibana is available for end users. If # `server.basePath` is configured this URL should end with the same basePath. #server.publicBaseUrl: ""
# The maximum payload size in bytes for incoming server requests. #server.maxPayload: 1048576
# The Kibana server's name. This is used for display purposes. server.name:"vm005-ubuntu005"
# =================== System: Kibana Server (Optional) =================== # Enables SSL and paths to the PEM-format SSL certificate and SSL key files, respectively. # These settings enable SSL for outgoing requests from the Kibana server to the browser. server.ssl.enabled:true server.ssl.certificate:/usr/local/kibana/config/kibana/kibana.crt server.ssl.key:/usr/local/kibana/config/kibana/kibana.key
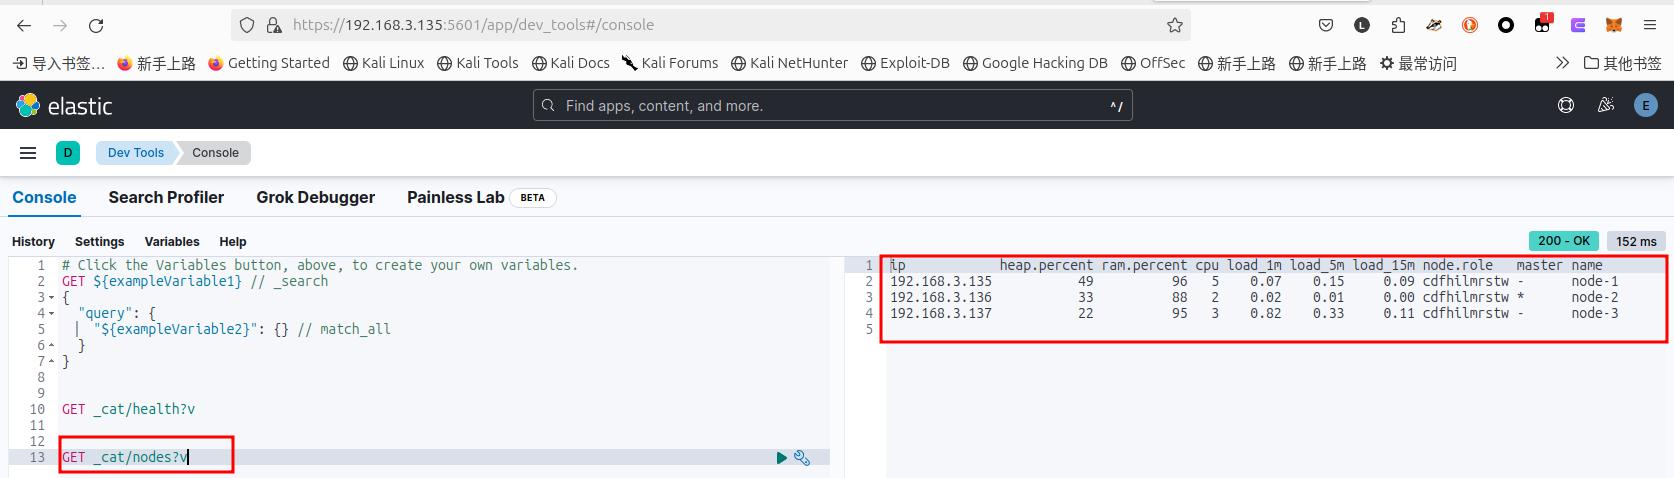
# =================== System: Elasticsearch =================== # The URLs of the Elasticsearch instances to use for all your queries. elasticsearch.hosts: ["https://192.168.3.135:9200"]
# If your Elasticsearch is protected with basic authentication, these settings provide # the username and password that the Kibana server uses to perform maintenance on the Kibana # index at startup. Your Kibana users still need to authenticate with Elasticsearch, which # is proxied through the Kibana server. elasticsearch.username:"kibana" elasticsearch.password:"ZoaMa4*ozG5aPM8YcAxC"
# Kibana can also authenticate to Elasticsearch via "service account tokens". # Service account tokens are Bearer style tokens that replace the traditional username/password based configuration. # Use this token instead of a username/password. #elasticsearch.serviceAccountToken: "eyJ2ZXIiOiI4LjEzLjQiLCJhZHIiOlsiMTkyLjE2OC4zLjEzNTo5MjAwIl0sImZnciI6IjVkOGQzZGVkZDRmZmZhNmEzM2Y0MjU1ZDk4NzE4NTRlMjkzNTA1ZDJhM2I3MmRlMGQyMjNhNjMzN2Y0MTIxODAiLCJrZXkiOiJUOEEzeDQ4QjRicGZGb3prdG5fNTo0MjN2RU5QMVNjU2JLZy1VQ3RReXdBIn0="
# Time in milliseconds to wait for Elasticsearch to respond to pings. Defaults to the value of # the elasticsearch.requestTimeout setting. #elasticsearch.pingTimeout: 1500
# Time in milliseconds to wait for responses from the back end or Elasticsearch. This value # must be a positive integer. #elasticsearch.requestTimeout: 30000
# The maximum number of sockets that can be used for communications with elasticsearch. # Defaults to `Infinity`. #elasticsearch.maxSockets: 1024
# Specifies whether Kibana should use compression for communications with elasticsearch # Defaults to `false`. #elasticsearch.compression: false
# List of Kibana client-side headers to send to Elasticsearch. To send *no* client-side # headers, set this value to [] (an empty list). #elasticsearch.requestHeadersWhitelist: [ authorization ]
# Header names and values that are sent to Elasticsearch. Any custom headers cannot be overwritten # by client-side headers, regardless of the elasticsearch.requestHeadersWhitelist configuration. #elasticsearch.customHeaders: {}
# Time in milliseconds for Elasticsearch to wait for responses from shards. Set to 0 to disable. #elasticsearch.shardTimeout: 30000
# =================== System: Elasticsearch (Optional) =================== # These files are used to verify the identity of Kibana to Elasticsearch and are required when # xpack.security.http.ssl.client_authentication in Elasticsearch is set to required. #elasticsearch.ssl.certificate: /path/to/your/client.crt #elasticsearch.ssl.key: /path/to/your/client.key
# Enables you to specify a path to the PEM file for the certificate # authority for your Elasticsearch instance. elasticsearch.ssl.certificateAuthorities: [ "/usr/local/elastic/config/certs/elastic-stack-ca.p12" ]
# To disregard the validity of SSL certificates, change this setting's value to 'none'. elasticsearch.ssl.verificationMode:none
# =================== System: Logging =================== # Set the value of this setting to off to suppress all logging output, or to debug to log everything. Defaults to 'info' #logging.root.level: debug
## Enables you to specify a file where Kibana stores log output. #logging.appenders.default: # type: file # fileName: /var/logs/kibana.log # layout: # type: json
# Enables debug logging on the browser (dev console) #logging.browser.root: # level: debug
# =================== System: Other =================== # The path where Kibana stores persistent data not saved in Elasticsearch. Defaults to data #path.data: data
# Specifies the path where Kibana creates the process ID file. #pid.file: /run/kibana/kibana.pid
# Set the interval in milliseconds to sample system and process performance # metrics. Minimum is 100ms. Defaults to 5000ms. #ops.interval: 5000
# Specifies locale to be used for all localizable strings, dates and number formats. # Supported languages are the following: English (default) "en", Chinese "zh-CN", Japanese "ja-JP", French "fr-FR". #i18n.locale: "en"
# =================== Frequently used (Optional)===================
# =================== Saved Objects: Migrations =================== # Saved object migrations run at startup. If you run into migration-related issues, you might need to adjust these settings.
# The number of documents migrated at a time. # If Kibana can't start up or upgrade due to an Elasticsearch `circuit_breaking_exception`, # use a smaller batchSize value to reduce the memory pressure. Defaults to 1000 objects per batch. #migrations.batchSize: 1000
# The maximum payload size for indexing batches of upgraded saved objects. # To avoid migrations failing due to a 413 Request Entity Too Large response from Elasticsearch. # This value should be lower than or equal to your Elasticsearch cluster’s `http.max_content_length` # configuration option. Default: 100mb #migrations.maxBatchSizeBytes: 100mb
# The number of times to retry temporary migration failures. Increase the setting # if migrations fail frequently with a message such as `Unable to complete the [...] step after # 15 attempts, terminating`. Defaults to 15 #migrations.retryAttempts: 15
# =================== Search Autocomplete =================== # Time in milliseconds to wait for autocomplete suggestions from Elasticsearch. # This value must be a whole number greater than zero. Defaults to 1000ms #unifiedSearch.autocomplete.valueSuggestions.timeout: 1000
# Maximum number of documents loaded by each shard to generate autocomplete suggestions. # This value must be a whole number greater than zero. Defaults to 100_000 #unifiedSearch.autocomplete.valueSuggestions.terminateAfter: 100000