
在 ubuntu 22.04 中,通过源码安装 cacti 服务
系统环境
| 标题 | 版本 | 备注 |
|---|---|---|
| 系统版本 | ubuntu 22.04.3 LTS (Jammy Jellyfish) | - |
| 内核版本 | 5.15.0-91-generic #98-Ubuntu SMP Mon Oct 2 15:18:56 UTC 2023 x86_64 x86_64 x86_64 GNU/Linux | - |
| Tengine | v3.1.0 | - |
| PHP | v7.4.30 | - |
| MariaDB | v10.11.7 | - |
| Cacti | v1.2.26 | - |
Cacti 简介
Cacti 官方网址: https://www.cacti.net/
Cacti 官方文档: https://docs.cacti.net/Install-Under-CentOS_LEMP.md
Cacti 是一款基于 PHP、RRDTool、SNMPv1/v2/v3 协议的开源网络监控图形化工具。它可以通过定期采集服务器或网络设备的数据,并将这些数据绘制成直观的图表形式,帮助管理员更好地监控和了解网络/系统的运行状态。
Cacti 的主要特点包括:
数据采集
- 支持通过 SNMP 从网络设备(如路由器、交换机)采集数据
- 支持通过命令或脚本从本地主机采集数据
- 支持多种数据采集方式,包括 CPU 负载、内存利用率、磁盘空间、网络流量等
数据存储
- 使用高性能的 RRDTool 存储数据
- 支持自动创建 RRD 文件,无需手动干预
数据展示
- 提供基于 Web 的友好图形界面
- 可自定义色彩、大小和布局
- 支持水平和垂直图表模式
用户管理
- 支持创建多个用户账户
- 每个用户有自己的图表权限和配置
插件支持
- 官方和社区提供了许多插件,扩展了 Cacti 的功能
- 如预定义的模板、特定设备支持等
报警提醒
- 支持基于阈值的报警提醒
- 可通过邮件、命令等形式接收报警通知
总的来说,Cacti 提供了一个易于使用、功能丰富的网络监控解决方案,适合中小型企业和网络运维团队使用。它可以帮助用户随时掌握网络/系统的状态,提高运维效率。
LTMP 环境部署
关于 LTMP 环境中的 Tengine 安装,请参考:在 ubuntu 22.04 中,通过源码编译安装 LTMP 中的 Tengine 服务(不支持 Lua 脚本语言)
官方给出的配置文档案例:Install-Under-CentOS_LEMP
关于 cacti 虚拟主机的配置如下:
1 | server { |
关于 LTMP 环境中的 MariaDB 安装,请参考:在 ubuntu 22.04 中,通过二进制安装 MariaDB 服务
关于 cacti 数据库的创建及授权如下:
1 | -- 登陆数据库 |
关于 LTMP 环境中的 PHP 安装,请参考:在 ubuntu 22.04 中,通过源码编译安装 LNMP 中的 PHP 环境
Cacti 安装
1.添加运行 cacti 的用户:
1 | useradd -s /sbin/nologin cacti |
2.点击这里下载 cacti 到服务器的 /usr/local/src/ 目录下:
1 | wget -O /usr/local/src/cacti-1.2.26.tar.gz https://files.cacti.net/cacti/linux/cacti-1.2.26.tar.gz |
3.将下载的源码文件解压到下载目录:
1 | tar -zxf /usr/local/src/cacti-1.2.26.tar.gz -C /usr/local/src/ |
4.将解压目录移动到 nginx web 目录 /data/website/ 下并重命名为 cacti
1 | mv /usr/local/src/cacti-1.2.26 /data/website/cacti |
5.在 /data/website/cacti/log/ 目录创建2个日志文件,分别为:
1 | touch /data/website/cacti/log/{cacti.log,cacti_stderr.log} |
6.编辑重命名后的 cacti 目录 /data/website/cacti/include 下的 config.php 文件,找到数据库配置端,配成上上面创建的 cacti 库信息,如下:
1 | $database_type = 'mysql'; |
7.导入 cacti 目录 /data/website/cacti/ 下的 cacti.sql 到数据库 cacti 中:
1 | mysql -ucacti -p -h 127.0.0.1 cacti < /data/website/cacti/cacti.sql |
8.将重命名后的 cacti 目录所属主和组都修改为 php 运行用户 php-fpm:
1 | chown -R php-fpm:php-fpm /data/website/cacti |
9.打开浏览器,输入服务器IP,开始安装,如图:
注意: 这里报错
1 | FATAL: Connection to Cacti database failed. Please ensure: |
查看系统日志输出:
1 | May 10 09:09:51 instance-2UkeKOzr mariadbd[563398]: 2024-05-10 9:09:51 3206 [Warning] Access denied for user 'cactir'@'localhost' (using password: YES) |
检查下上面配置的 cacti 连接数据库配置是否有误,创建的 cacti 数据库信息根 include/config.php 配置的是否一致!
10.刷新下浏览器,如下图: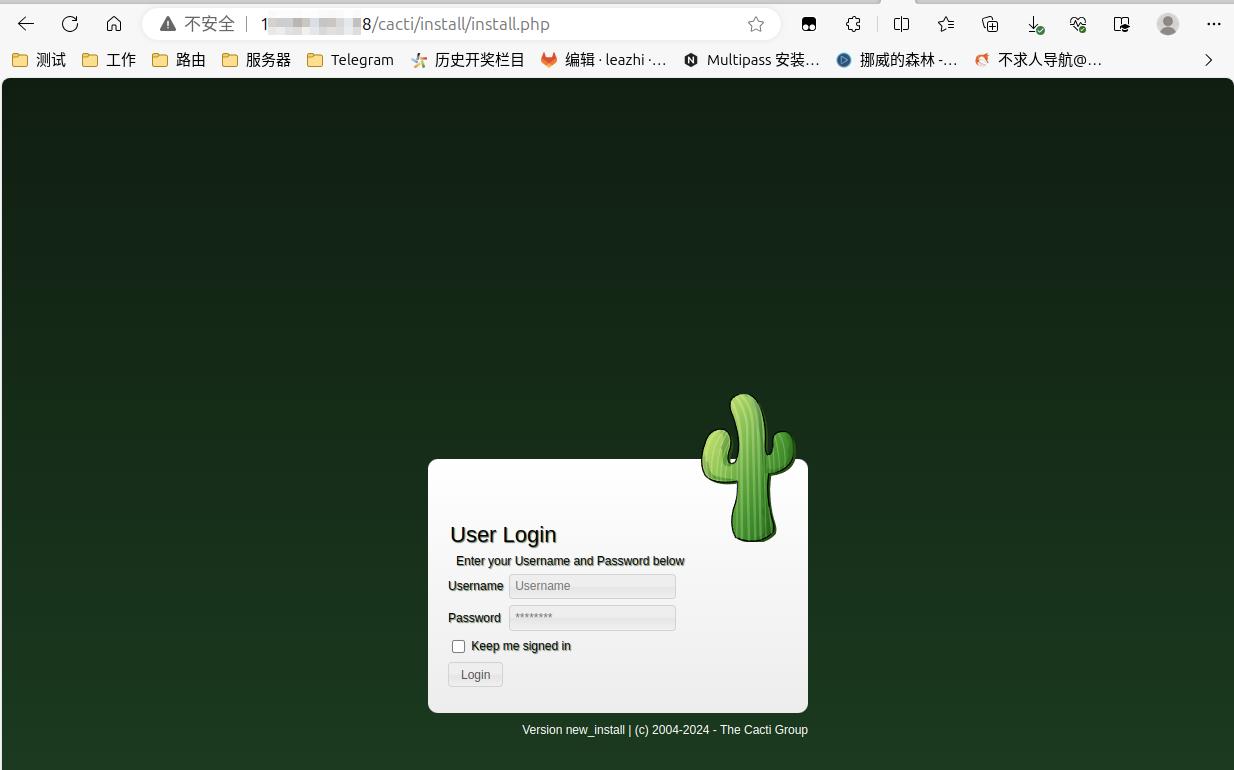
11.使用默认账号(admin)密码(admin)登陆,然后要求修改密码,新密码要求(大小写子字母+数字+特殊字符)如图: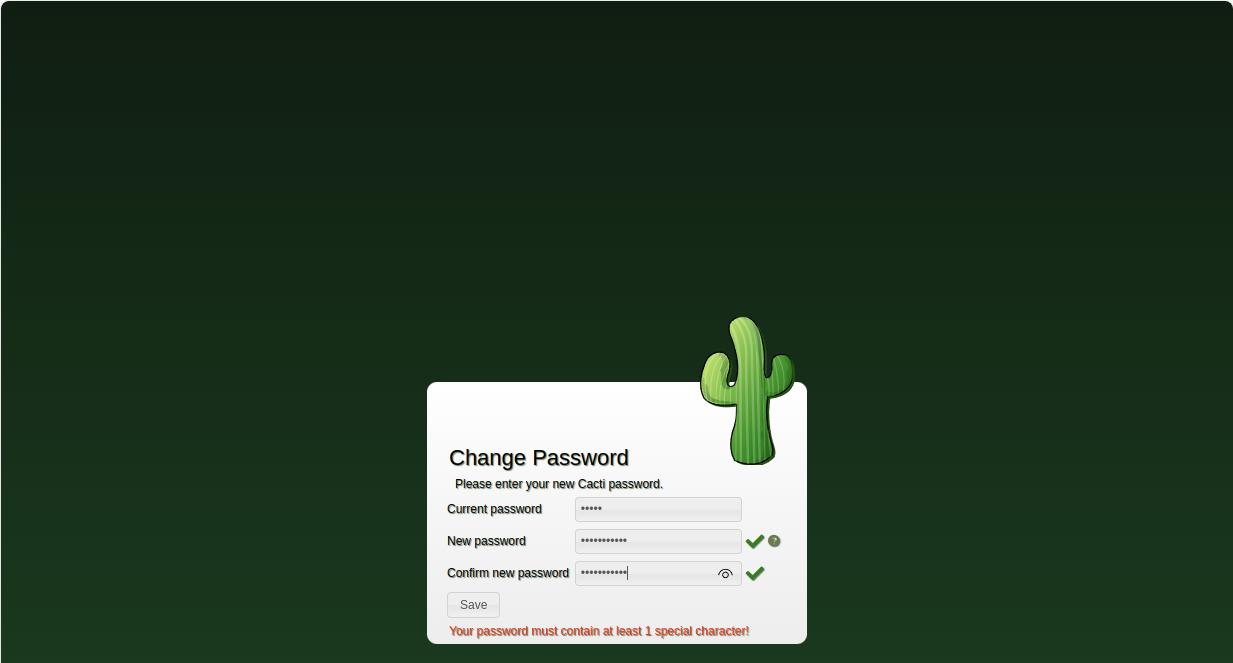
12.密码修改成功后,正式进入安装页面。首先,第一步:切换语言和接受 GPL 许可协议: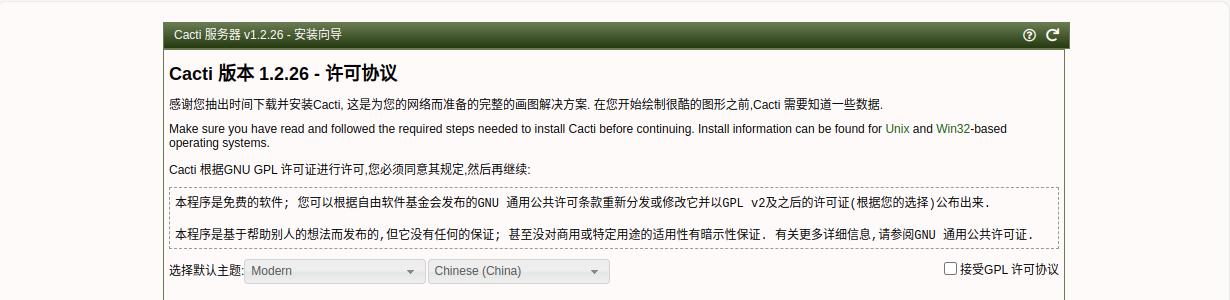
13.第二步:预安装检查,需要保证所有条件满足,如下图: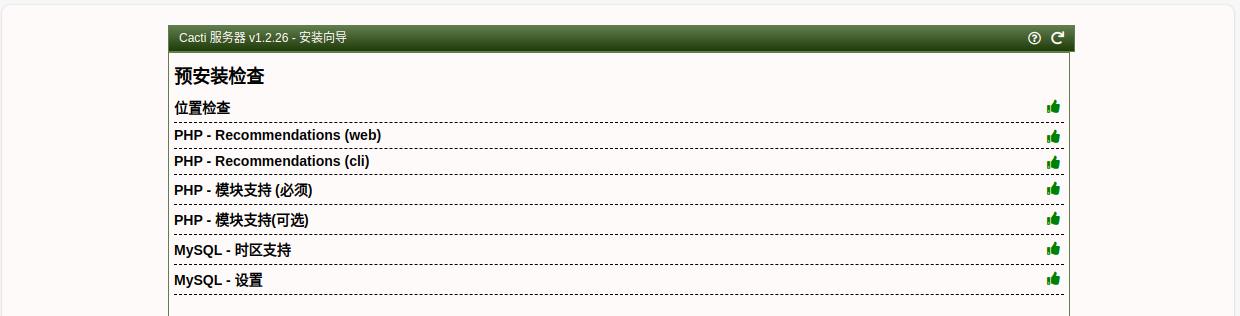
预安装检查:PHP - Recommendations (web)
1.编辑 php 安装目录 /usr/local/php/etc/ 下的 php.ini 文件,将 memory_limit = 128M 调整成 memory_limit = 400M, 同时,启用 ;date.timezone = ,将其值设置为 date.timezone = Asia/Shanghai。
1 | sed -i 's@memory_limit = 128M@memory_limit = 400M@' /usr/local/php/etc/php.ini |
2.然后重启下 php 服务:
1 | systemctl restart php-fpm.service |
预安装检查:PHP - Recommendations (cli)
这一步不满足,是因为在安装 php 时没有将 php 可执行文件写入系统环境变量。所以在这里我们只需要将 php 安装目录 /usr/local/php/bin/ 下的 php 可执行文件软链接到 /usr/sbin/ 目录下:
1 | ln -s /usr/local/php/bin/php /usr/sbin/ |
预安装检查:PHP - Module Support (Required)
由于在安装 php 时没有器用 ladp 模块,所以这里只能手动安装下了,具体过程如下:
1.安装 libldap-dev 包:
1 | apt install -y libldap-dev |
2.进入到 php 源码目录 /usr/local/src/php-7.4.30/ 下的 ext/ldap/ 目录里:
1 | cd /usr/local/src/php-7.4.30/ext/ldap/ |
3.在该目录中执行 phpize
1 | /usr/local/php/bin/phpize |
4.执行 ./configure
1 | ./configure --with-php-config=/usr/local/php/bin/php-config |
5.执行 make && make install 进行安装
1 | make && make install |
6.编辑 php 安装目录 /usr/local/php/etc/ 下的 php.ini 文件,找到 ;extension=ldap 将其启用:
1 | sed -i 's@;extension=ldap@extension=ldap@' /usr/local/php/etc/php.ini |
7.然后重启下 php-fpm 服务:
1 | systemctl restart php-fpm.service |
预安装检查:PHP - Module Support (Optional)
由于在安装 php 时没有器用 snmp 模块,所以这里只能手动安装下了,具体过程如下:
1.安装 libsnmp-dev 包:
1 | apt install -y libsnmp-dev |
2.进入到 php 源码目录 /usr/local/src/php-7.4.30/ 下的 ext/snmp/ 目录里:
1 | cd /usr/local/src/php-7.4.30/ext/snmp/ |
3.在该目录中执行 phpize
1 | /usr/local/php/bin/phpize |
4.执行 ./configure
1 | ./configure --with-php-config=/usr/local/php/bin/php-config |
5.执行 make && make install 进行安装
1 | make && make install |
6.编辑 php 安装目录 /usr/local/php/etc/ 下的 php.ini 文件,找到 ;extension=snmp 将其启用:
1 | sed -i 's@;extension=snmp@extension=snmp@' /usr/local/php/etc/php.ini |
7.然后重启下 php-fpm 服务:
1 | systemctl restart php-fpm.service |
预安装检查:MySQL - TimeZone Support
加载时区到 mariadb 数据库:
1 | root@instance-2UkeKOzr:~# /usr/local/mysql/bin/mysql_tzinfo_to_sql /usr/share/zoneinfo/ |mysql -uroot -p mysql |
预安装检查:MySQL - Settings
1.编辑 /etc/my.cnf 文件,在 [mysqld] 添加如下参数:
1 | [mysqld] |
2.重启下 maraidb 服务:
1 | systemctl restart mariadb.service |
14.进入 安装类型 页面后,我哦门在选择 安装类型 为 新的主要服务器, 如图:
15.在 目录权限检查 页面,要确保所有条件都满足,如图:
16.在 关键的可执行程序位置和版本 页面,要确保所有的二进制路径都配置正确,如图: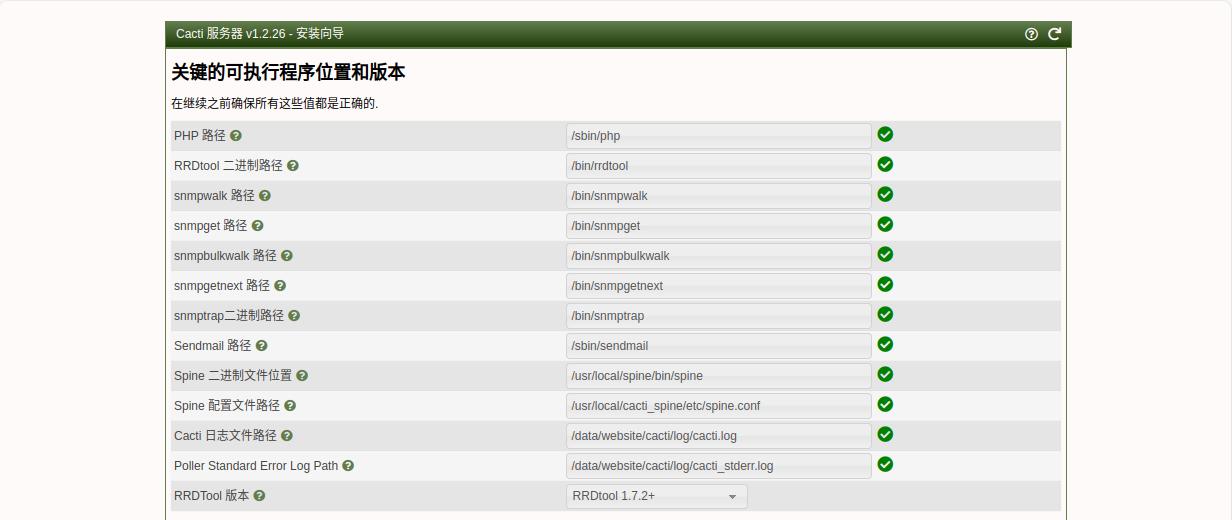
关键的可执行程序位置和版本:RRDtool
执行命令安装 rrdtool:
1 | apt install -y rrdtool |
关键的可执行程序位置和版本:snmpwalk、snmpget、snmpbulkwalk、snmpgetnext、snmptrap
执行命令安装 snmp:
1 | apt install -y snmp |
关键的可执行程序位置和版本:Sendmail
执行命令安装 sendmail:
1 | apt install -y sendmail |
关键的可执行程序位置和版本:spine
1.安装必要的依赖包:
1 | apt install -y libtool autoconf automake dos2unix help2man |
2.从 cacti 官方站点下载 spine 源码包到服务器的 /usr/local/src/ 目录下:
1 | wget -O /usr/local/src/cacti-spine-1.2.26.tar.gz https://files.cacti.net/spine/cacti-spine-1.2.26.tar.gz |
3.解压到下载目录:
1 | tar -zxf /usr/local/src/cacti-spine-1.2.26.tar.gz -C /usr/local/src/ |
4.进入解压目录:
1 | cd /usr/local/src/cacti-spine-1.2.26/ |
5.执行 ./bootstrap
1 | ./bootstrap |
6.执行 ./configure :
1 | ./configure --prefix=/usr/local/cacti_spine --with-reentrant |
7.执行 make && make install:
1 | make && make install |
8.复制 cacti_spine 安装目录 /usr/local/cacti_spine/etc/ 下的 spine.conf.dist 文件为 spine.conf:
1 | cp /usr/local/cacti_spine/etc/spine.conf.dist /usr/local/cacti_spine/etc/spine.conf |
9.编辑 /usr/local/cacti_spine/etc/spine.conf ,找到连接数据库段落配置,将其配置为 cacti 数据库链接信息,如下:
1 | DB_Host 127.0.0.1 |
17.进入 Input Validation Whitelist Protection 页面后,我们勾选 I hava read this statement, 如下图:
18.进入 默认配置文件页面后,我们只需要配置 默认自动化网络 下的 网络范围,至于最下面的 其他SNMP选项 则根据自身需求开启。如下图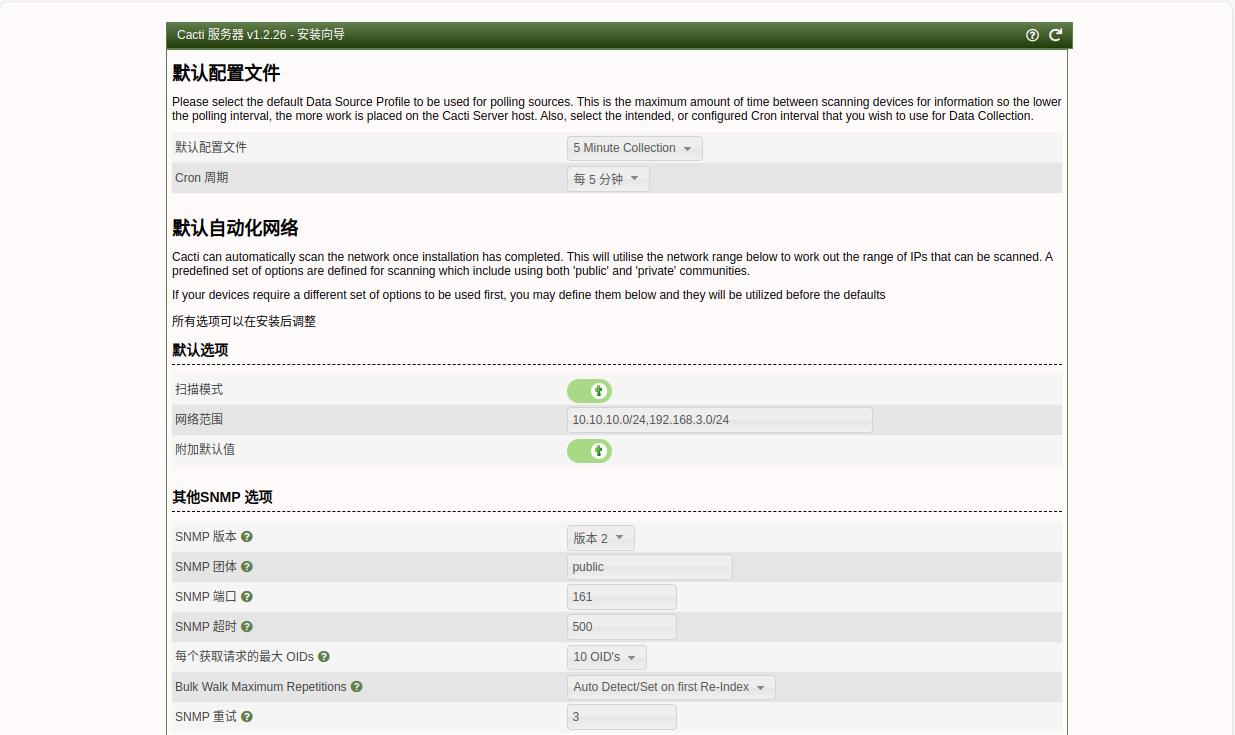
19.进入 模板设置 页面后,我们保持默认即可,如图: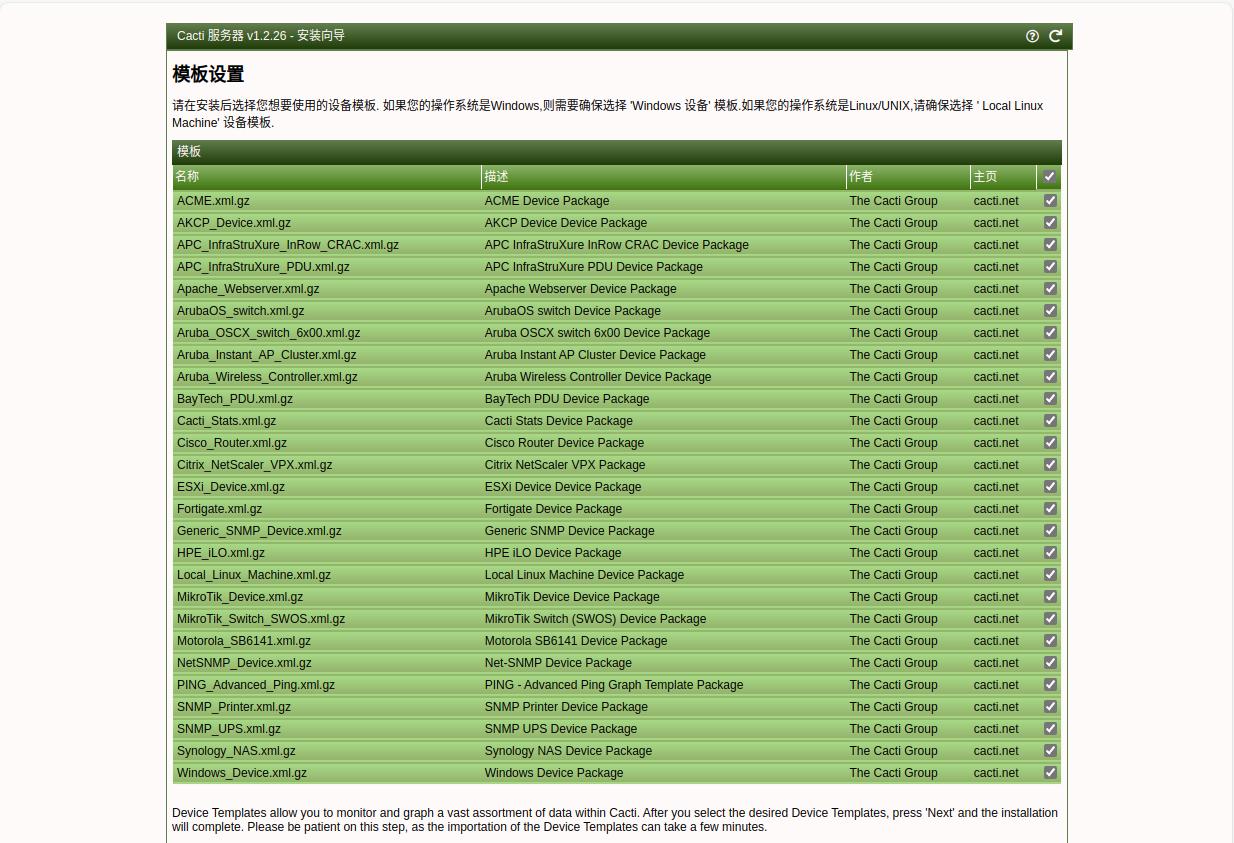
20.进入 服务器排序 页面后,保持默认,如图: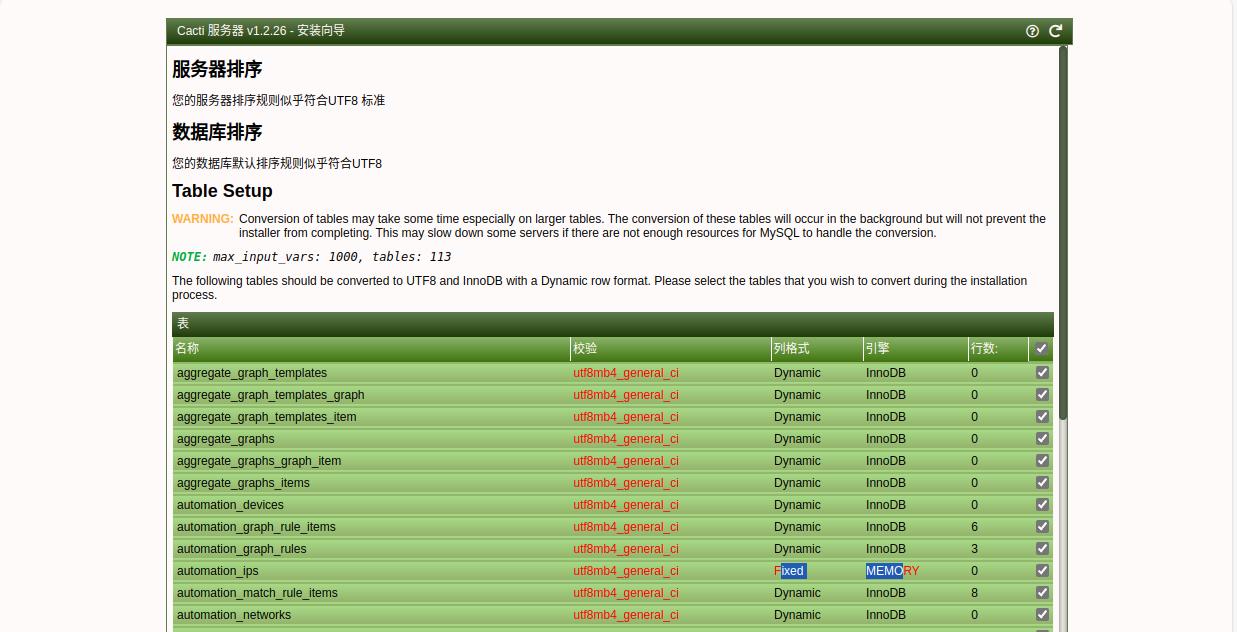
21.进入 确认安装 页面后,勾选 确认安装 ,如下图:
安装过程(根据服务器的配置,需要时间等待安装):
22.安装完成,如下图: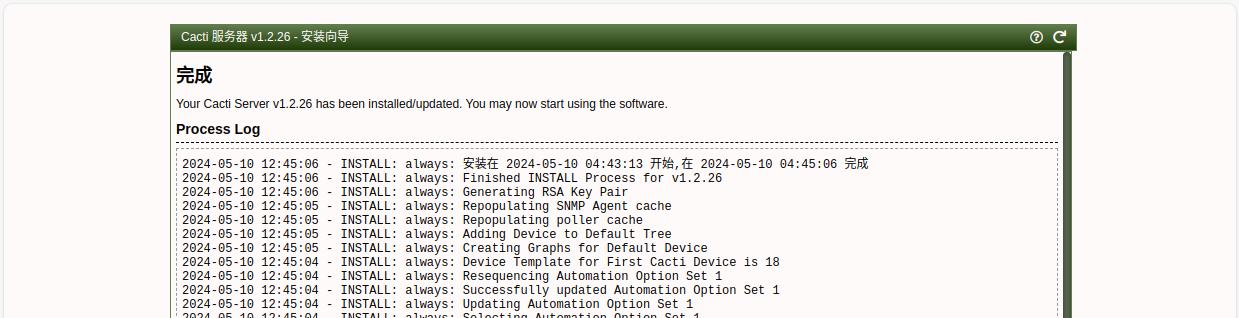
点击左下角的开始使用,就进入了 Cacti 界面了,如下图:
不出图报 the cacti poller has not run yet 的解决方法
1.安装 snmpd 包:
1 | apt install -y snmpd |
2.登陆 cacti web 端,点击左侧导航栏中的 系统配置 —> 设置, 确保右侧菜单栏 路径下的 备用poller 路径 下的 Spine 二进制文件位置 配置正确:
同时确保右侧菜单栏 Poller下的 基本 配置项下的 采集类型 为 spine,如下图: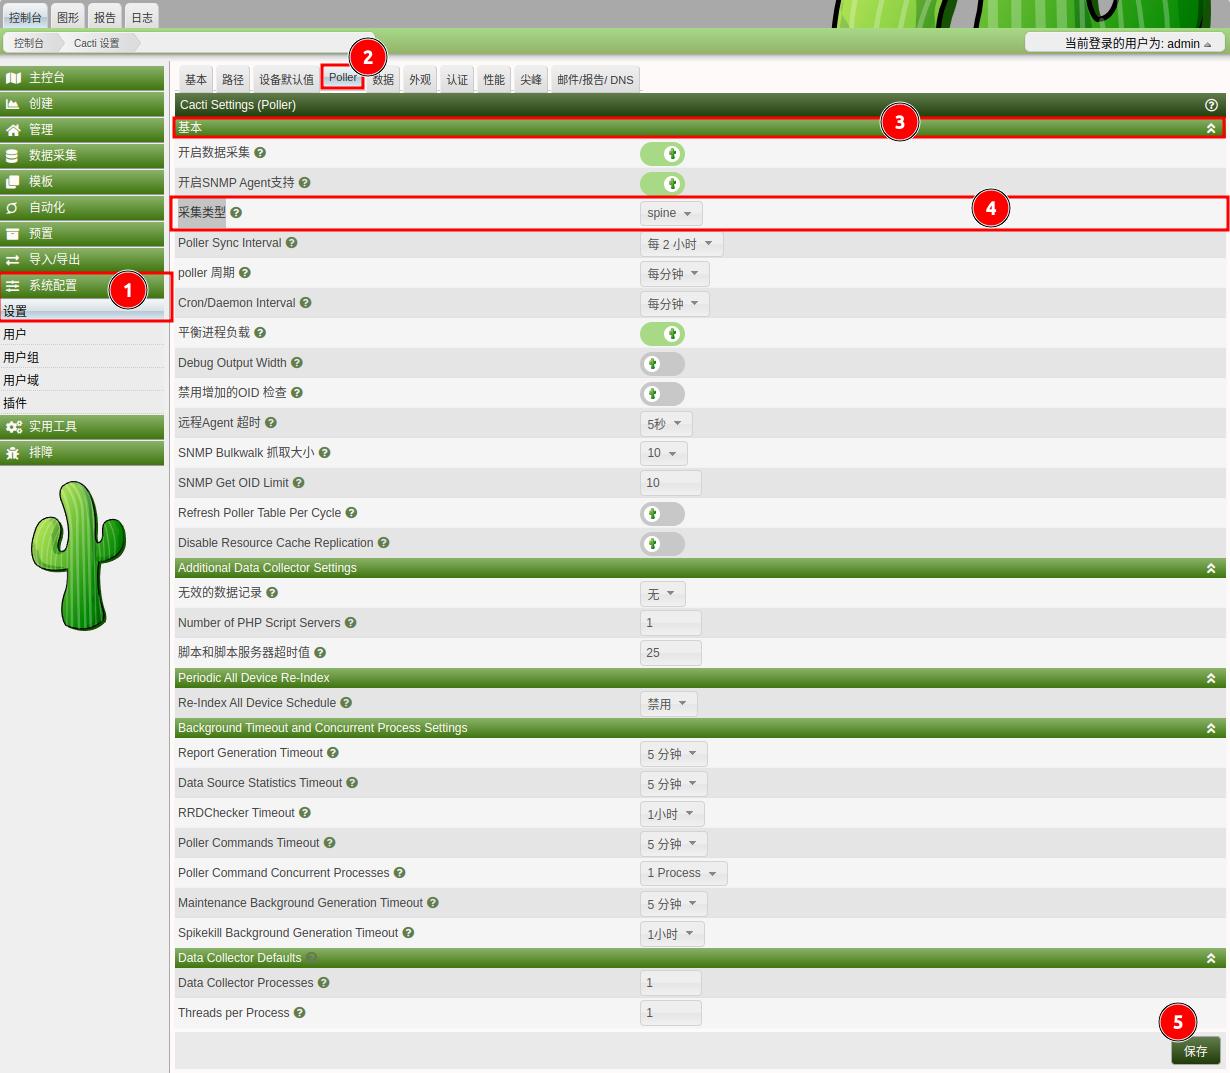
接下来,根据设置的 poller 采集周期,我们还需要在服务器上设置一个计划任务,如:
1 | */1 * * * * /usr/local/php/bin/php /data/website/cacti/poller.php > /dev/null 2>&1 |
3.然后,回到服务器的命令行终端,执行命令 snmpwalk -v 2c -c public localhost ,看能否得到数据输出:
1 | root@instance-2UkeKOzr:/usr/local/src/cacti-spine-1.2.26# snmpwalk -v 2c -c public localhost |
4.回到 cacti web 页面,点击左侧导航栏中的 管理 —> 设备, 点击右侧 设备 配置项下的主机名称,如图: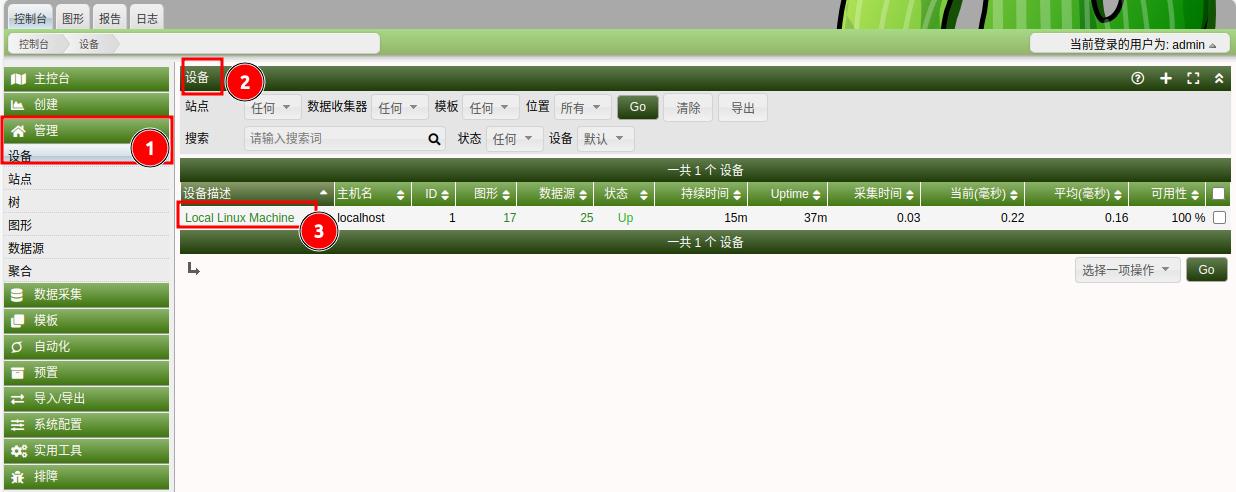
进入到设备配置页面后,按下图所示进行配置,最后点击保存:
安装报错及解决方法
configure 报错:
make 报错
错误一:cannot find -lmysqlclient_r: No such file or directory
报错详细信息:
1 | /bin/bash ./libtool --tag=CC --mode=link gcc -I/usr/include/net-snmp -I/usr/include/net-snmp/.. -I/usr/local/mysql/include/mysql -g -O2 -L/usr/lib/x86_64-linux-gnu -o spine sql.o spine.o util.o snmp.o locks.o poller.o nft_popen.o php.o ping.o keywords.o error.o -lmysqlclient_r -lm -ldl -lcrypto -lz -lpthread -ldl -lm -lpthread -lssl |
解决方法:
在编译参数后面添加 LDFLAGS=-L/usr/local/mysql/lib/ FLAGS=-L/usr/local/mysql/include ,重新编译即可!
1 | ./configure --prefix=/usr/local/cacti_spine --with-reentrant --with-mysql LDFLAGS=-L/usr/local/mysql/lib/ FLAGS=-L/usr/local/mysql/include |
错误二:No help2man
报错详细详细:
1 | false // No help2man // --output=spine.1 --name='Data Collector for Cacti' --no-info --version-option='--version' ./spine |
解决方法:
安装 help2man
1 | apt install -y help2man |
然后重新执行 ./configure --prefix=/usr/local/cacti_spine --with-reentrant --with-mysql LDFLAGS=-L/usr/local/mysql/lib/ FLAGS=-L/usr/local/mysql/include
1 | ./configure --prefix=/usr/local/cacti_spine --with-reentrant --with-mysql LDFLAGS=-L/usr/local/mysql/lib/ FLAGS=-L/usr/local/mysql/include |
在执行 make
1 | make |
参考文档:
Linux-Console.net - 如何在 Ubuntu 22.04 上安装 Cacti 监控工具
博客园 - Cacti1.2.14最新版安装和配置(详细版)
CSDN - 网络监控cacti1.2.12安装部署(一)
CSDN - CACTI的客户端SNMP设置